Android Project Configuration
Learn how to modify the application packaging, logo design, Firebase API configurations, endpoints, and Google AdMob settings.
Change the Application Logo
To replace the default launcher icon and visual branding logo inside the app:
- Design a custom square logo (PNG format, recommended size
512x512px). - Rename the file to
app_logo.png. - Paste and overwrite the logo file inside the directory:
Android App/app/src/main/res/drawable/app_logo.png - The app main manifest automatically links to this resource using standard tags:
android:icon="@drawable/app_logo"
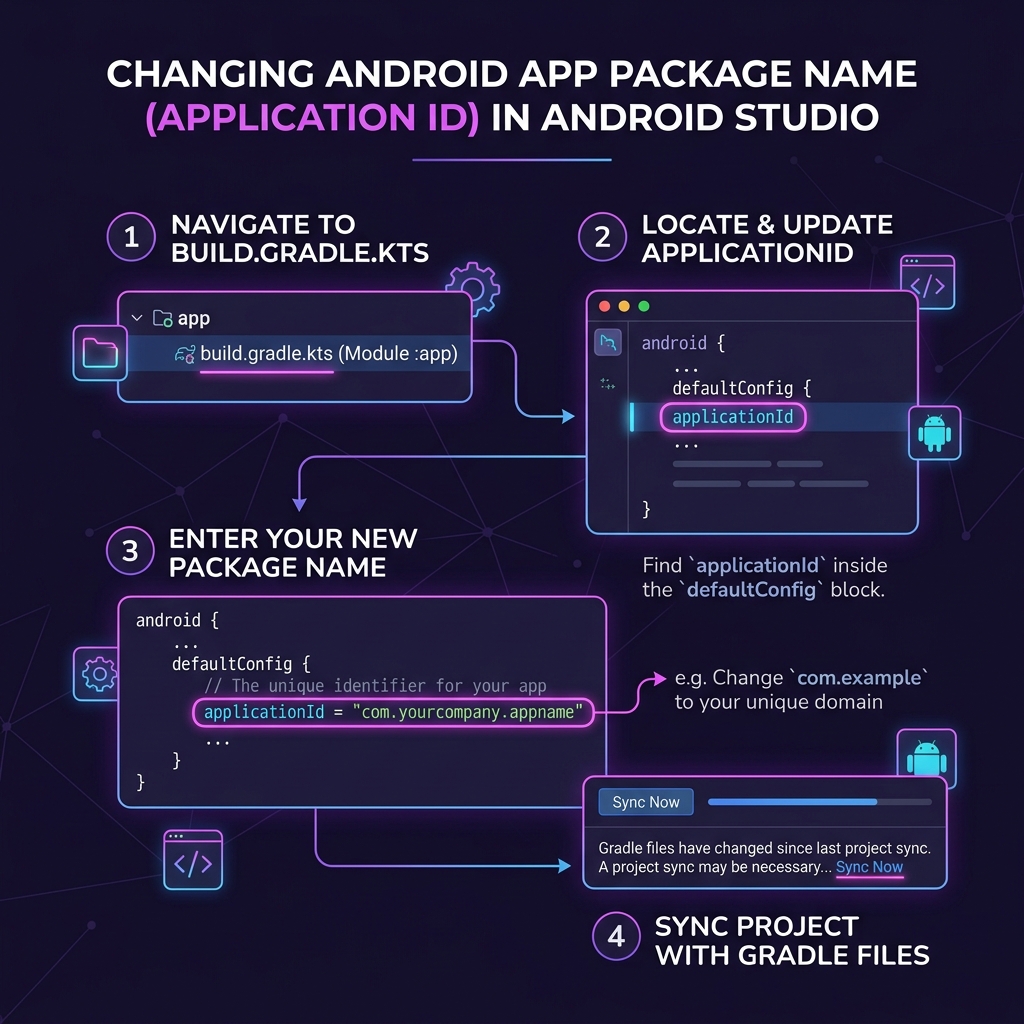
Change Package Name (Application ID)
The Application ID acts as the unique identifier for your app on the Google Play Store. It is configured in the application-level Gradle settings:
- Open the file:
Android App/app/build.gradle.kts - Locate the
applicationIdline insidedefaultConfig:
3. Update the package name string to your custom store package ID (e.g. "com.yourname.snapreels").
4. To refactor package structures inside Android Studio: Select target Java packages directory folders, right click and choose Refactor -> Rename -> Rename Package.
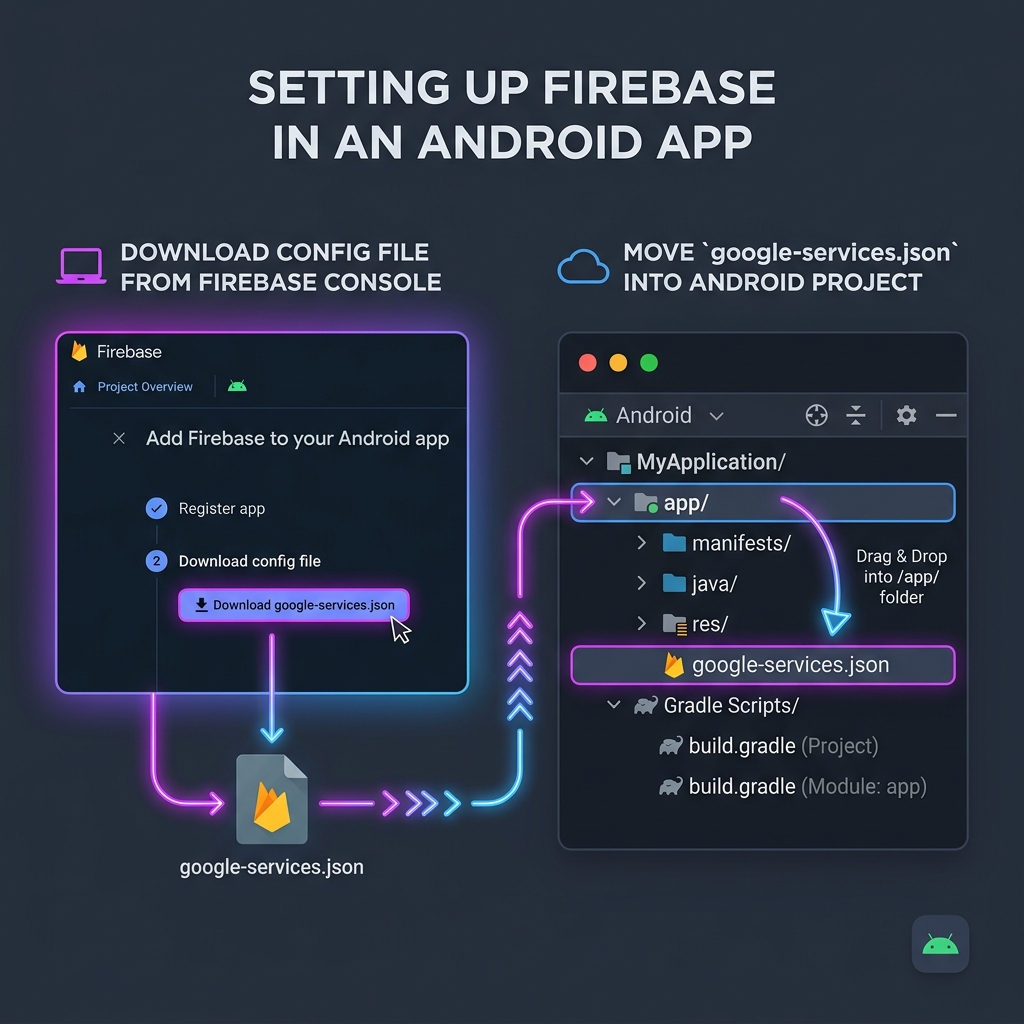
Configure Firebase Console & Setup file
To enable authentication, login mechanisms, and notifications, you must link Firebase Services:
- Go to the Firebase Console and add a new Android Project.
- Enter the exact package name (Application ID) configured in Step 2.
- Register the app and download the configuration file:
google-services.json. - Drag and paste the downloaded file directly inside your app folder:
Android App/app/google-services.json
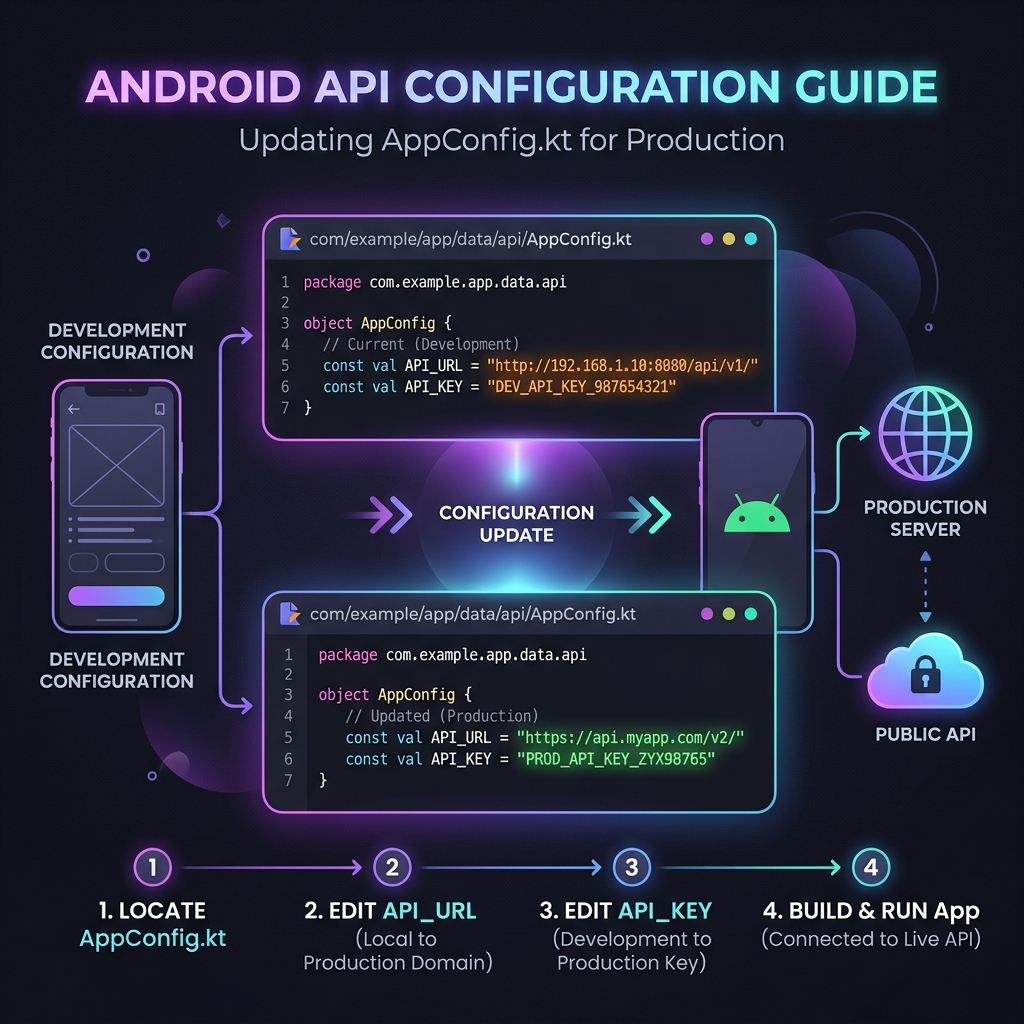
Configure API URL & Security Keys
The Android app interacts with your server database via API calls. Update your app configuration values here:
- Open the configuration file:
Android App/app/src/main/java/com/example/data/AppConfig.kt - Replace the endpoints and secrets to match your live production website server:
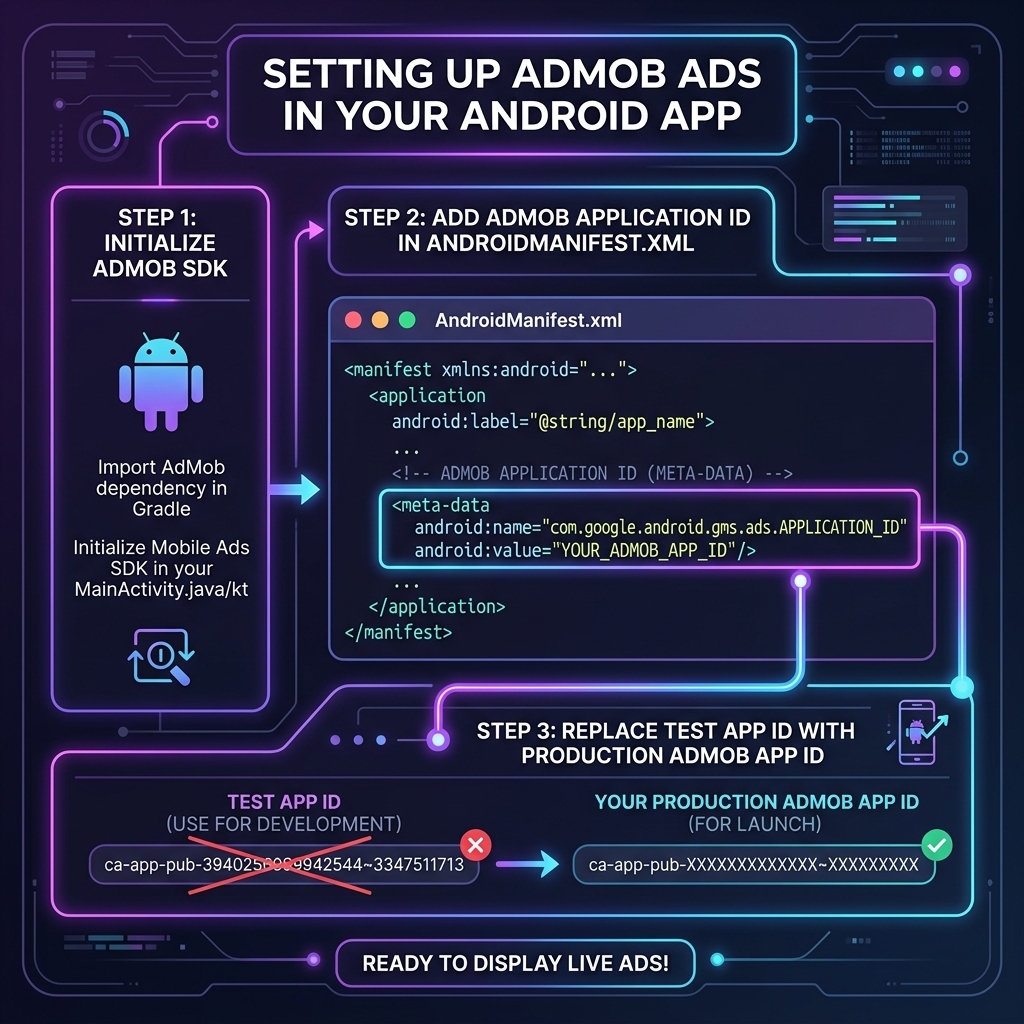
Configure Google AdMob Ads
To display advertisements in your mobile app, configure your primary Google AdMob App ID inside the manifest properties:
- Open the file:
Android App/app/src/main/AndroidManifest.xml - Scroll down inside the
<application>element to locate the AdMob metadata tags:
3. Replace the test application ID value (ca-app-pub-3940256099942544~3347511713) with your live production AdMob Application ID.
Important Notice for Ad Units
Do not hardcode individual ad unit IDs (Banner, Reward, Interstitial) in the source code. You can configure them dynamically in the online Admin Panel under Mobile Application Settings once your server is live.